In the pursuit of ensuring the longevity and structural integrity of your home, it is paramount to address the issue of interior roof leaks promptly and efficiently. This article, aptly titled “Fixing Interior Roof Leaks: Essential Tips and Techniques,” seeks to shed light on the elusive question of whether a roof leak can indeed be fully rectified from the inside. Through a comprehensive examination of key tips and techniques, you will gain valuable insights into the intricate process of identifying and remedying interior roof leaks, empowering you to protect your property from potential damages and costly repairs.
Identifying the Source of the Leak
Inspecting the interior for signs of a roof leak
When you suspect a roof leak, the first step is to inspect the interior of your home for any signs. Look for water stains on ceilings, walls, and around windows or skylights. These stains often indicate that water is entering your home from the roof. Additionally, check for any dripping or pooling water, as this can help identify the location of the leak.
Checking for moisture stains and water damage
Moisture stains and water damage are clear indicators of a roof leak. Look for discoloration, peeling paint or wallpaper, and damp areas on walls and ceilings. Pay close attention to areas near roof openings such as vents, chimneys, and skylights, as these areas are more prone to leaks. Identifying the extent of the water damage will help you determine the necessary repairs.
Identifying areas prone to leaks
Certain areas of your roof are more prone to leaks than others. These areas include valleys where two roof planes meet, roof edges, and areas near flashing. Inspect these areas closely for any signs of wear, damage, or deteriorating sealant. Identifying these vulnerable areas can help you focus your repair efforts and prevent future leaks.
Using a moisture meter to locate the source
If you’re having trouble locating the source of a roof leak, using a moisture meter can be helpful. A moisture meter measures the moisture level in materials such as drywall and wood. By using the meter along the suspected leak area, you can determine if there is excess moisture present. This can help you pinpoint the exact source of the leak and ensure more targeted repairs.
Preparation and Safety Measures
Gathering necessary tools and materials
Before you begin any roof leak repair, gather all the necessary tools and materials. This will save you time and ensure you have everything you need to complete the job. Common tools you may need include a ladder, hammer, utility knife, caulk gun, and a pry bar. Additionally, you’ll need roofing sealant, caulk, roof tape, replacement shingles, and flashing material, depending on the type of repair required.
Ensuring personal safety with protective gear
When working on your roof, personal safety should be a top priority. Make sure you wear proper protective gear, including a hard hat, safety glasses, and slip-resistant shoes. Gloves are also recommended to protect your hands. Additionally, use caution when climbing ladders and working on steep roofs. If you’re unsure about your ability to safely complete the repair, it’s best to consult a professional.
Preparing the work area to avoid further damage
Before you start any repairs, it’s important to prepare the work area to avoid causing further damage. Clear any debris from the roof, such as leaves or branches, and sweep away dust or loose shingle granules. This will ensure a clean working surface and prevent debris from falling into the repair area. Additionally, cover any furniture or belongings inside your home to protect them from potential water damage.
Turning off electricity in case of water proximity
When dealing with roof leaks, there is always a risk of water coming into contact with electrical components. As a safety measure, it’s recommended to turn off the electricity to any areas that could be affected by water ingress. This includes rooms directly below the leak or any rooms where electrical outlets or fixtures are showing signs of water damage. By eliminating the risk of electrical shock, you can work on the repairs with peace of mind.

This image is property of www.pjfitz.com.
Fixing Minor Roof Leaks
Using roof sealant or caulk to patch small holes
For minor roof leaks, such as small holes or cracks in the roof surface, roof sealant or caulk can often provide an effective temporary fix. Clean the area around the leak and apply the sealant or caulk, making sure to spread it evenly and cover the entire affected area. Allow it to dry thoroughly before testing for leaks. Keep in mind that this is just a temporary solution and may require periodic reapplication.
Applying waterproof roof tape for temporary repairs
Waterproof roof tape is another option for temporary repairs of small roof leaks. This adhesive-backed tape is designed to create a watertight seal when applied to the damaged area. Clean the area thoroughly and apply the tape, ensuring it is pressed firmly and smoothly onto the surface. It’s important to note that roof tape is not a permanent solution and should be replaced with a more comprehensive repair as soon as possible.
Replacing damaged or missing shingles
If the leak is caused by damaged or missing shingles, replacement is often necessary. Start by removing the damaged shingles, using a pry bar to lift the surrounding shingles and gently remove the nails. Once the damaged shingles are removed, slide new shingles into place, ensuring they align properly with the existing shingles. Secure them with roofing nails and apply roofing cement to seal the edges.
Repairing cracked flashing
Flashing refers to the metal or waterproof material used to seal gaps and joints on the roof. Cracked or damaged flashing can contribute to roof leaks. To repair cracked flashing, clean the area thoroughly and remove any old or damaged material. Apply roofing sealant to the crack and press the flashing back into place. Use roofing nails or screws to secure the flashing, and apply an additional layer of sealant for added protection.
Addressing Major Roof Leaks
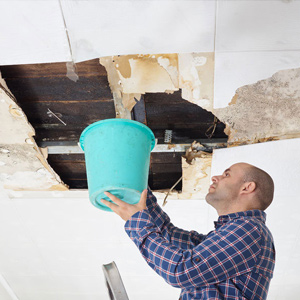
Managing extensive water damage
Major roof leaks can result in extensive water damage to your home. In such cases, it’s important to take immediate action to mitigate the damage. If the leaking is severe, consider using buckets or tarps to collect or divert the water away from valuable items and electrical components. Additionally, consult a professional roofer to assess the situation and provide expert help with the necessary repairs.
Consulting professional roofers for expert help
Addressing major roof leaks often requires the expertise of professional roofers. While minor repairs can be tackled as DIY projects, major leaks may involve complex issues that require specialized knowledge and equipment. Professional roofers have the necessary experience to accurately diagnose the source of the leak and provide comprehensive repairs to prevent further damage. Seeking their help can save you time, money, and potential complications.
Considering roof replacement for severe leaks
In cases where the roof leak is extensive and the damage is severe, a complete roof replacement may be necessary. This is especially true if your roof is outdated or has experienced multiple leaks in the past. While a roof replacement is a significant investment, it ensures long-term protection for your home, eliminates the risk of future leaks, and can improve energy efficiency. Consult a trusted roofing professional to assess if roof replacement is the best solution for your situation.
Temporary measures to control water ingress
While awaiting professional help or preparing for a roof replacement, it’s important to implement temporary measures to control water ingress. Using tarps or plastic sheeting, cover the affected areas to prevent further water damage. Ensure the tarps are securely fastened and direct the water away from your home. Although these measures provide temporary relief, it’s essential to address the underlying cause of the leak as soon as possible.

This image is property of capstonebros.com.
Repairing Leaks around Roof Openings
Inspecting and repairing damaged vent boots
Vent boots are used to seal the area around plumbing vent pipes on the roof. Over time, these boots can deteriorate or become damaged, leading to leaks. Inspect the vent boots for any signs of cracks or deterioration. If damaged, remove the existing boot and replace it with a new one, ensuring a proper fit and adequate sealing. Applying roofing sealant around the edges of the new boot will provide additional protection against leaks.
Fixing leaks near chimneys and skylights
Chimneys and skylights are common areas for roof leaks to occur. Inspect the flashing around these openings for any signs of damage or wear. Remove any old or deteriorated flashing and replace it with new flashing. Apply roofing sealant to ensure a watertight seal. If the leak persists, consult a professional to assess the condition of the chimney or skylight and recommend any necessary repairs.
Adjusting and sealing plumbing roof vents
Plumbing roof vents are another potential source of leaks. These vents are designed to allow air to escape from plumbing systems. Inspect the vents for any cracks, gaps, or loose fittings. If any issues are identified, adjust the vent to ensure a proper fit and tighten any loose fittings. Apply roofing sealant around the vent to create a tight seal and prevent water from entering.
Ensuring proper sealing of roof-mounted equipment
If you have roof-mounted equipment such as HVAC units or satellite dishes, improper sealing around these installations can lead to leaks. Inspect the seals and connections of the equipment to ensure they are watertight. Apply roofing sealant or flashing tape to any gaps or areas of potential water ingress. This will help maintain the integrity of the roof and prevent leaks.
Using Interior Sealants
Understanding the types of interior sealants available
Interior sealants are products designed to prevent water from leaking through the interior surfaces of your home. There are various types of sealants available, including silicone-based, latex-based, and polyurethane-based sealants. Each type has its own advantages and limitations, so it’s important to choose the appropriate sealant for your specific needs.
Applying interior sealants to prevent further leaks
Interior sealants are convenient options for temporarily preventing further leaks. Clean the affected area and make sure it is dry before applying the sealant. Follow the manufacturer’s instructions for application, ensuring you cover the entire affected area. Keep in mind that interior sealants are temporary solutions and may not provide long-term protection against leaks. It’s essential to address the underlying cause of the leak for a more permanent fix.
Considering the limitations and temporary nature of sealants
While interior sealants can be effective in controlling minor leaks, it’s important to understand their limitations. Sealants provide a temporary solution and may not be suitable for severe or recurring leaks. They are not designed to replace proper repairs or address underlying structural issues. If you have persistent or major roof leaks, it’s best to consult a professional for a more comprehensive solution.
Consulting professionals for sustainable solutions
While interior sealants can provide temporary relief from roof leaks, it’s crucial to consult professionals for sustainable solutions. Licensed roofers have the expertise to identify the root cause of the leak and provide effective and lasting repairs. They can also evaluate the overall condition of your roof and recommend preventative measures to avoid future leaks.

This image is property of s42814.pcdn.co.
Addressing Condensation-Related Leaks
Understanding the causes of interior condensation
Interior condensation can result in moisture build-up, leading to leaks and water damage. It occurs when warm, moist air comes into contact with cooler surfaces, such as windows or poorly insulated areas. High humidity levels, inadequate ventilation, and temperature differentials contribute to condensation. Identifying and addressing the underlying causes is essential for preventing condensation-related leaks.
Improving ventilation to reduce condensation
Proper ventilation is crucial in controlling interior condensation. Ensure that your home has adequate ventilation, particularly in humid areas such as bathrooms and kitchens. Consider installing exhaust fans to remove excess moisture. Additionally, ensure that your attic has proper ventilation to prevent the buildup of humid air that can seep into your living spaces.
Installing vapor barriers to control moisture
Vapor barriers are materials designed to prevent moisture from seeping through walls or ceilings. Installing a vapor barrier on the interior side of exterior walls can help control condensation and prevent moisture-related leaks. Consult a professional to determine the appropriate type and placement of vapor barriers for your specific situation.
Addressing insulation issues to prevent condensation
Poor insulation can contribute to condensation and subsequent leaks. Inspect your home’s insulation, particularly in areas prone to leaks or condensation, such as attics or crawl spaces. Improve insulation in these areas to prevent warm, moist air from coming into contact with cooler surfaces. Proper insulation will help maintain a consistent temperature and reduce the risk of condensation-related leaks.
Maintaining Gutters and Downspouts
Regularly cleaning and clearing debris from gutters
Gutters play a crucial role in directing water away from your roof and home. However, if they become clogged with leaves, twigs, or other debris, they can cause water to overflow, leading to roof leaks. Regularly cleaning and clearing debris from your gutters is essential for proper water flow. Use a ladder to access your gutters and remove any obstructions. Consider installing gutter guards to prevent debris accumulation in the future.
Repairing any leaks or cracks in gutters
Inspect your gutters for any leaks or cracks that could contribute to roof leaks. Common areas for leaks include joints and seams. If you identify any issues, repair them promptly. Clean the affected area, apply gutter sealant or caulk, and press the edges together to create a watertight seal. Regularly inspecting and maintaining your gutters will help prevent leaks and water damage.
Ensuring downspouts direct water away from the roof
The function of downspouts is to carry water from the gutters and direct it away from the roof and foundation of your home. Ensure that your downspouts are properly positioned and directing water away from these areas. Extensions can be added to downspouts to ensure water is discharged a safe distance from your home’s foundation. This will help prevent water from pooling near the roof and seeping into your home.
Installing gutter guards to prevent clogs and backups
Gutter guards are devices designed to prevent debris from entering and clogging your gutters. They are particularly beneficial in areas with a high presence of leaves and other small debris. Installing gutter guards can save you time and effort in cleaning your gutters, as well as prevent clogs and backups that could lead to roof leaks. Consult a professional to determine the most suitable type of gutter guards for your home.

This image is property of www.truevalue.com.
Regular Roof Inspections and Maintenance
Scheduling annual roof inspections
To prevent roof leaks and prolong the life of your roof, scheduling annual inspections is essential. Regular roof inspections allow early detection of potential issues and prompt repairs, minimizing the risk of leaks and extensive damage. Consider hiring a professional roofing contractor to conduct a thorough inspection and identify any areas that require attention.
Identifying and addressing small issues promptly
During your regular roof inspections, it’s crucial to identify and address small issues promptly. This includes repairing loose or damaged shingles, fixing minor leaks, and replacing deteriorated or cracked flashing. By addressing these small issues as soon as they are detected, you can prevent them from developing into larger, more costly problems.
Cleaning and removing moss or algae growth
Moss or algae growth on your roof can contribute to roof leaks and damage. These organisms retain moisture and can accelerate the deterioration of your roof. Regularly clean your roof and remove any moss or algae growth using a soft brush or low-pressure power washer. This will help maintain the integrity of your roof and prevent potential leaks.
Trimming tree branches near the roof to prevent damage
Overhanging tree branches can pose a risk to your roof. They can scrape against the surface, causing damage to shingles or flashing. Additionally, fallen branches or leaves can accumulate on your roof and clog gutters, leading to water backups and leaks. Trim any tree branches that are in close proximity to your roof to prevent potential damage and minimize the risk of roof leaks.
Dealing with Emergency Roof Leaks
Taking immediate action to minimize damage
When faced with an emergency roof leak, taking immediate action is crucial to minimize damage. Move any valuable or sensitive items away from the affected area to prevent water damage. Be prepared to collect water using buckets or tarps to divert the flow away from your home. Speed is of the essence in preventing further damage and addressing the emergency effectively.
Using buckets or tarps to collect or divert water
If you don’t have the means to immediately fix the roof leak, using buckets or tarps can help collect or divert water away from areas at risk of damage. Place buckets strategically to catch dripping water and empty them regularly. Use tarps to cover the affected area, ensuring they are secured and directing the water away from your home. These measures provide temporary relief until professional repairs can be made.
Contacting professional roofers for emergency repairs
When dealing with an emergency roof leak, it’s crucial to contact professional roofers as soon as possible. Emergency roofers are equipped to handle urgent repairs and can provide immediate assistance to minimize damage. They have the necessary expertise, tools, and materials to fix the leak effectively and provide any temporary measures needed to protect your home until a permanent solution can be implemented.
Documenting the damage for insurance purposes
In the event of an emergency roof leak, documenting the damage is crucial for insurance purposes. Take photographs or videos that clearly show the extent of the leak and any resulting damage to your property. This evidence will help support your insurance claim and ensure proper compensation for repairs. Additionally, keep records of any emergency repairs performed and retain copies of invoices or receipts for reimbursement.

This image is property of www.billraganroofing.com.