In order to effectively troubleshoot roof leaks without the presence of an attic, certain strategies must be employed. The absence of an attic presents unique challenges in locating and fixing roof leaks, as the lack of access to the underside of the roof can hinder the identification of potential problem areas. This article will provide you with practical tips and techniques to help you navigate this issue, ensuring that you are able to efficiently detect and address roof leaks without the assistance of an attic. By following these steps, you will be equipped with the knowledge and tools necessary to effectively troubleshoot roof leaks, safeguarding your home from potential water damage.
Identifying the Presence of a Leak
When it comes to finding a roof leak without an attic, there are several telltale signs to look out for. By inspecting the interior for water stains, examining exterior signs of water damage, and checking for dampness or moldy smells, you can begin to narrow down the source of the leak.
Inspecting the Interior for Water Stains
Start by thoroughly examining the interior of your home for any visible water stains or discolorations on the ceiling or upper walls. These stains are often the first indication that there may be a leak in your roof. Pay close attention to areas near chimneys, skylights, and vents, as these are common areas where leaks tend to occur. Take note of the location and size of the stains, as this information will be helpful in identifying the source of the leak.
Examining Exterior Signs of Water Damage
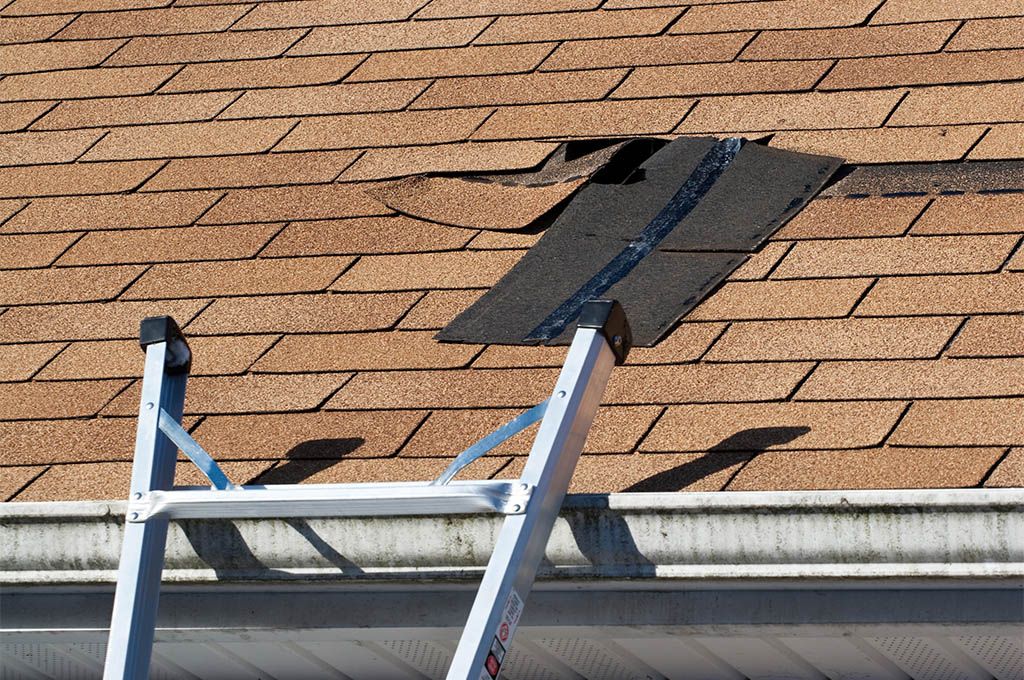
Next, take a close look at the exterior of your home for any signs of water damage. Keep an eye out for cracked or missing shingles, damaged flashing, or any other areas where water may be entering. Look for water stains or discoloration on the roof itself, as well as on the walls or siding of your home. Additionally, check for any sagging or drooping areas on the roof, as this could indicate structural damage.
Checking for Dampness or Moldy Smells
Another way to determine if you have a leak in your roof is by checking for dampness or moldy smells in your home. Even without visible water stains, the presence of moisture or a musty odor could indicate a leak. Check in areas such as bathrooms, kitchens, and basements, as these areas are more prone to moisture-related issues. If you notice any dampness or moldy smells, it’s important to address the issue promptly to prevent further damage and potential health hazards.
Assessing Roofing Materials and Structures
Once you’ve identified the presence of a leak, the next step is to assess the condition of your roofing materials and structures. By analyzing the roofing material, examining flashing and seals, and inspecting roof valleys, you can gain insight into the integrity of your roof.
Analyzing the Roofing Material
The type and condition of your roofing material play a significant role in determining its vulnerability to leaks. Different materials such as asphalt shingles, metal, or tile have varying lifespans and susceptibility to damage. Inspect the entire roof surface to check for any cracked, broken, or missing shingles, as these can create entry points for water. Additionally, look for signs of aging, such as shingle granules in the gutters or curling edges, as these are indications that your roof may be nearing the end of its lifespan.
Examining Flashing and Seals
Flashing and seals are crucial components of a watertight roof. Flashing is used to seal joints and transitions, such as where the roof meets a chimney or skylight. Inspect the flashing for any signs of damage, such as cracks, deterioration, or gaps. Similarly, check the seals around vents and pipes, ensuring they are intact and secure. Any compromised flashing or seals should be promptly repaired or replaced to prevent water infiltration.
Inspecting Roof Valleys
Roof valleys are vulnerable areas where two roof sections intersect, channeling water down to the gutters. Thoroughly examine the roof valleys for any signs of damage, such as cracked or missing shingles or deteriorated underlayment. Any issues in the roof valleys should be addressed promptly, as they can contribute to significant leaks if left unattended.

This image is property of www.pjfitz.com.
Examining Roof Penetrations and Vents
Roof penetrations and vents are areas on the roof where various elements, such as chimneys, skylights, and vent pipes, pass through the surface. These areas are prone to leaks, and a thorough inspection is essential to identify and address any potential problems.
Checking Chimneys and Skylights
Begin by inspecting the chimneys and skylights on your roof. Look for any cracked or damaged flashing around these penetrations, as well as any gaps or missing caulking. Ensure that the flashing is tightly sealed against the chimney or skylight and that there are no visible signs of water intrusion. Additionally, check the surrounding roofing material for any damage or deterioration that could result in leaks.
Inspecting Vent Pipes and Stacks
Next, examine the vent pipes and stacks on your roof. These are typically found on the uppermost areas of the roof and are essential for proper ventilation. Check for any gaps or cracks in the flashing around the vent pipes, as well as any signs of deteriorated seals or damaged roofing material. Improperly sealed or damaged vent pipes can allow water to enter the roof, leading to leaks and potentially more extensive damage over time.
Inspecting Gutters and Downspouts
The condition of your gutters and downspouts is crucial for effective water drainage and preventing leaks. By analyzing the gutter system for blockages and examining downspouts for damage, you can help maintain the integrity of your roof.
Analyzing Gutter System for Blockages
Inspect your gutters for any blockages or debris that may hinder proper water flow. Clogged gutters can lead to overflow, causing water to pool on your roof and potentially seep into the interior. Remove any leaves, twigs, or other debris from the gutters and ensure that they are securely attached to the roofline. Additionally, consider installing gutter guards to prevent future blockages and reduce the need for frequent maintenance.
Examining Downspouts for Damage
Once you’ve checked the gutters, turn your attention to the downspouts. Examine the downspouts for any damage, such as cracks or dents, that could impede the proper drainage of water. Ensure that the downspouts are securely connected to the gutters and direct water away from the foundation of your home. If you notice any issues with the downspouts, promptly repair or replace them to prevent water from accumulating near the roof and causing potential leaks.

This image is property of www.farinaroof.com.
Assessing Roof Slope and Drainage
The slope and drainage of your roof play a significant role in preventing leaks and water damage. By considering the pitch of the roof and examining the direction of water flow, you can address any potential drainage issues and mitigate the risk of leaks.
Considering the Pitch of the Roof
The pitch, or slope, of your roof determines how effectively water drains off its surface. Inspect the pitch of your roof to ensure that it allows for proper water runoff. Low-pitched roofs or areas with inadequate slope may experience water pooling, increasing the likelihood of leaks. If you suspect that your roof has a pitch-related issue, consult a professional contractor to assess the situation and recommend appropriate solutions.
Examining the Direction of Water Flow
Observe how water flows on your roof during rainfall. Ideally, water should flow smoothly down the roof and into the gutters and downspouts. However, if you notice water flowing in the opposite direction or pooling in certain areas, this could indicate a problem. It may be necessary to adjust the slope of your roof, repair damaged areas, or install additional drainage features to redirect water and prevent leaks.
Conducting a Water Test
In some cases, conducting a water test can help pinpoint the exact location of a roof leak. By gathering necessary tools and materials and utilizing a hose or sprinkler system, you can simulate rainfall conditions and observe where water enters your roof.
Gathering Necessary Tools and Materials
Before conducting a water test, gather the necessary tools and materials. You will need a hose or sprinkler system, a ladder to access the roof, and a helper to assist you in monitoring the interior for signs of water entry. Ensure that you have a reliable water source and enough hose length to reach the roof. Additionally, consider having a phone or radio handy to stay in communication with your helper during the test.
Utilizing a Hose or Sprinkler System
To simulate rainfall conditions, position your hose or sprinkler system on the roof, focusing on areas where leaks are suspected. Start by saturating the suspected area and gradually increase the water flow. While your helper monitors the interior for signs of water entry, carefully observe the roof for any areas where water appears to be penetrating. Take note of these spots, as they will require further investigation and repair.

This image is property of canuckroofing.ca.
Checking for Roof Deck Damage
The roof deck, or decking, provides the structural foundation for your roof. It is essential to evaluate its condition to identify any signs of rot or decay that could lead to leaks or compromised structural integrity.
Evaluating the Condition of Roof Decking
Inspect the roof decking for any visible signs of damage, such as sagging or warping. Carefully walk on the roof, ensuring that it is safe and stable to do so. Look for areas of discoloration, indicating moisture absorption or mold growth. Pay close attention to any soft spots or areas that feel unstable underfoot, as these could indicate rot or decay. If you notice any significant issues with your roof decking, it is crucial to consult a professional contractor for a more thorough assessment and necessary repairs.
Searching for Signs of Rot or Decay
To identify potential rot or decay, pay attention to the smell and appearance of the roof decking. If you notice a musty odor or see areas that appear discolored or weakened, these could be indications of rotting or decaying wood. Moisture infiltration, inadequate ventilation, or prolonged exposure to the elements can contribute to these issues. Addressing any rot or decay promptly is essential to prevent further damage and preserve the structural integrity of your roof.
Sealing Cracked or Damaged Roofing
If you have identified cracked or damaged areas on your roof, it is crucial to seal them promptly to prevent water infiltration. By cleaning and preparing the area, as well as applying roofing cement or patching materials, you can effectively address minor damages and minimize the risk of leaks.
Cleaning and Preparing the Area
Before sealing cracked or damaged roofing, ensure that the area is clean and free of debris. Use a brush or broom to remove any loose material and create a clean surface for the sealant. Additionally, check for any signs of moisture or mold growth, as these issues should be resolved before applying any sealing products.
Applying Roofing Cement or Patching Materials
Once the area is clean and properly prepared, apply roofing cement or patching materials to seal cracks or damaged areas. Follow the manufacturer’s instructions for the specific product you are using, as application methods may vary. Use a putty knife or trowel to apply the sealant, ensuring that it covers the damaged area completely. Smooth out the surface of the sealant to create a watertight barrier, and allow it to dry according to the product’s recommended drying time. Regularly inspect and maintain sealed areas to ensure their effectiveness and longevity.

This image is property of www.iko.com.
Considerations for Flat Roofs
If you have a flat roof, there are additional considerations to keep in mind when troubleshooting leaks. Assessing the ponding or standing water and inspecting flat roof drains and scuppers are essential steps in maintaining and addressing potential issues with flat roofs.
Assessing the Ponding or Standing Water
One common issue with flat roofs is ponding or standing water. Flat roofs are designed with a minimal slope to allow for water drainage, but inadequate slope or blocked drains can result in water pooling on the surface. Regularly assess your flat roof for areas where ponding occurs. If you notice any significant standing water that does not drain within 48 hours, consult a professional contractor to have the issue addressed. Ponding water can lead to structural damage and increased risk of leaks if left unattended.
Inspecting Flat Roof Drains and Scuppers
Properly functioning drains and scuppers are essential for effective water drainage on flat roofs. Regularly inspect these components to ensure that they are clear of debris and securely attached. If you notice any blockages, clean the drains or scuppers to maintain optimal water flow. Additionally, check for any signs of damage or deterioration and promptly repair or replace any compromised components.
Consulting a Professional Contractor
While troubleshooting a roof leak without an attic can be challenging, sometimes it is best to consult a professional contractor. They have the expertise and specialized tools to assess the complexity of the issue and provide appropriate recommendations and quotes for repairs.
Considering the Complexity of the Issue
Roof leaks can have various underlying causes, and diagnosing the exact source of the problem can be complex. A professional contractor will have the knowledge and experience to perform a thorough inspection and accurately identify the source of the leak. They can also assess the overall condition of your roof and provide recommendations for preventive measures or necessary repairs.
Gathering Recommendations and Quotes
When hiring a professional contractor, it is crucial to gather recommendations and obtain multiple quotes. Ask friends, neighbors, or local organizations for referrals to reputable contractors they have worked with in the past. Additionally, request quotes from at least three different contractors, comparing their expertise, proposed solutions, and pricing. This will help you make an informed decision and ensure that you receive quality service and value for your investment.
In conclusion, finding a roof leak without an attic requires a systematic approach and careful inspection. By identifying the presence of a leak, assessing roofing materials and structures, examining roof penetrations and vents, inspecting gutters and downspouts, assessing roof slope and drainage, conducting a water test, checking for roof deck damage, sealing cracked or damaged roofing, considering flat roof considerations, and consulting a professional contractor, you can effectively troubleshoot roof leaks and mitigate their potential damage. Remember, addressing roof leaks promptly is essential to prevent further damage to your home’s interior, structural integrity, and overall well-being.

This image is property of www.theroofingcompanylasvegas.com.